Minecraft, the wildly popular game, is accessible on a wide range of devices, including Chromebooks. Given the unique nature of Chrome OS, many users may question whether Minecraft can be played on their Chromebooks. Rest assured, the answer is a resounding yes!
In this comprehensive guide, we will walk you through the installation process and offer valuable tips for optimizing performance on your Chromebook.
Table of Contents
- General Information About Minecraft on a Chromebook
- Enabling Developer Mode
- Installing Minecraft on Chromebook
- Running the Game
- How to Play Minecraft on a Chromebook with Low Specs
- Enhancing Performance on Chrome OS
General Information About Minecraft on a Chromebook
For smooth gameplay on a Chromebook, Minecraft requires the following minimum specifications:
- System Architecture: 64-bit (x86_64, arm64-v8a)
- Processor: AMD A4-9120C, Intel Celeron N4000, Intel 3865U, Intel i3-7130U, Intel m3-8100Y, Mediatek Kompanio 500 (MT8183), Qualcomm SC7180 or better
- RAM: 4 GB
- Storage: at least 1 GB of free space
These are the basic requirements to run Minecraft on a Chromebook. If your device struggles with performance, we've included a guide later in this article to help you boost your game's performance. Now, let's delve into the installation process.
You can install the Bedrock Edition of Minecraft directly from the Google Play Store, which simplifies the process significantly. Just open the store, search for Minecraft, and navigate to its page. Note that the game costs $20. However, if you already own the Android version, which is priced at $7, you'll only need to pay an additional $13 to upgrade to the Chromebook version.
This method is perfect for those who prefer a straightforward installation process.
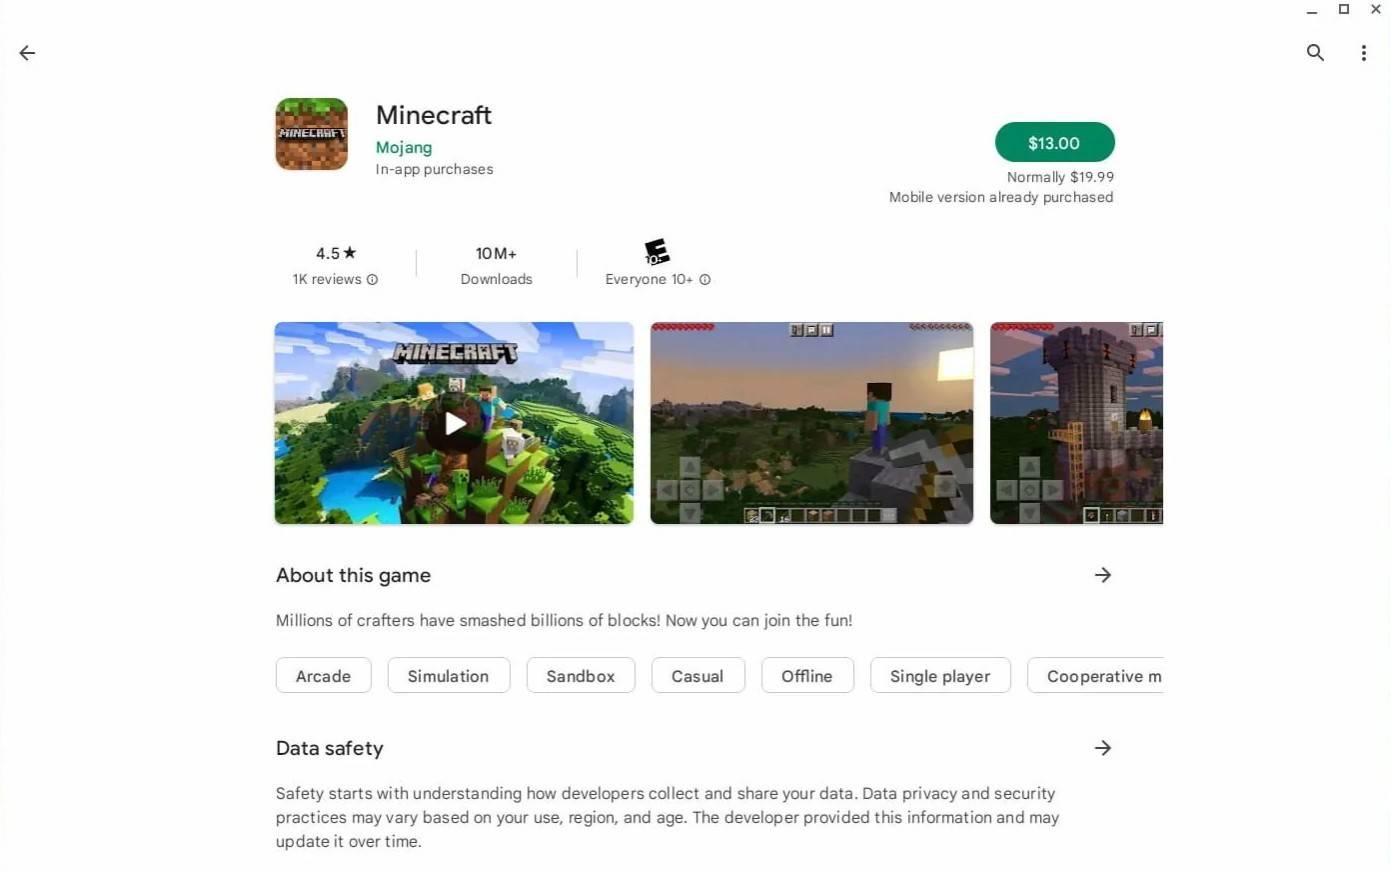 Image: aboutchromebooks.com
However, not everyone may be satisfied with the Bedrock Edition. Fortunately, since Chrome OS is based on Linux, you can also install the Linux version of Minecraft. This method requires more attention to detail as Chrome OS differs significantly from Windows, and some coding will be necessary. We have prepared a detailed guide to help you set up Minecraft on your Chromebook in just 30 minutes.
Enabling Developer Mode
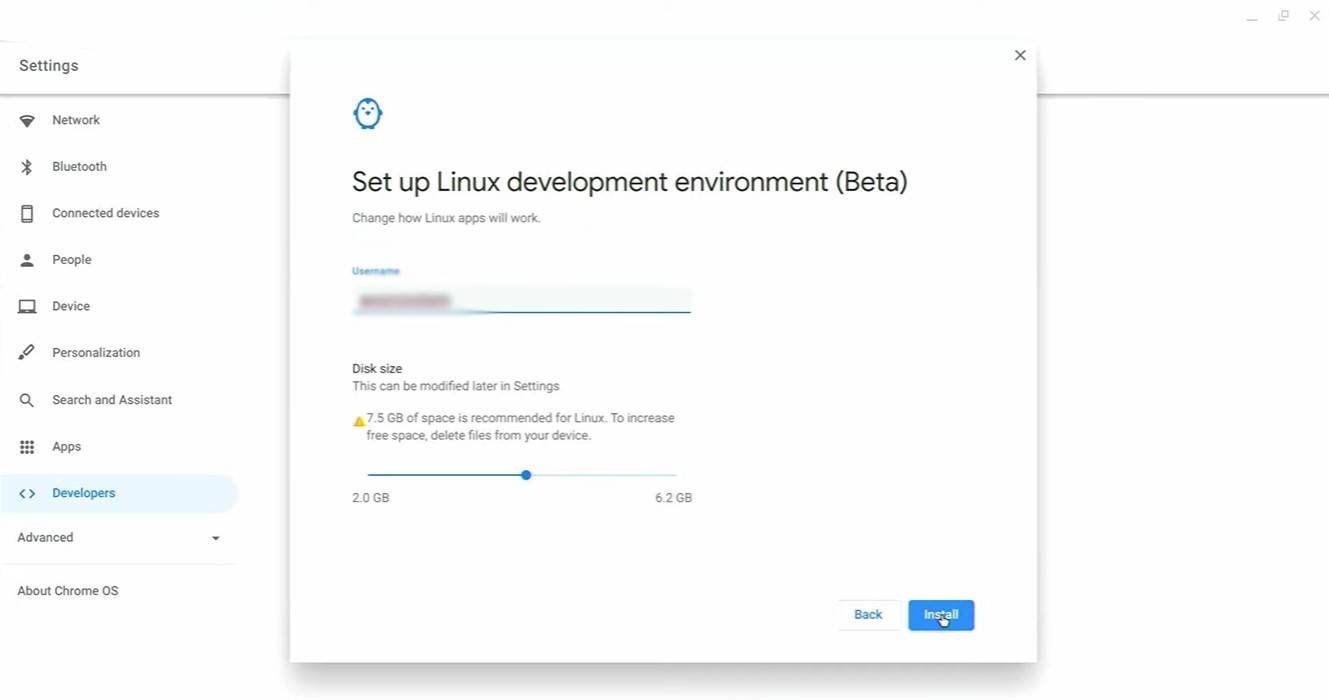 Image: youtube.com
To begin, you need to enable Developer Mode on your Chromebook. Access the settings menu from the equivalent of the "Start" menu and find the "Developers" section. Enable the "Linux development environment" option and follow the on-screen prompts. Once completed, the Terminal will open, which is similar to the command prompt in Windows and where you'll perform the next steps.
Installing Minecraft on Chromebook
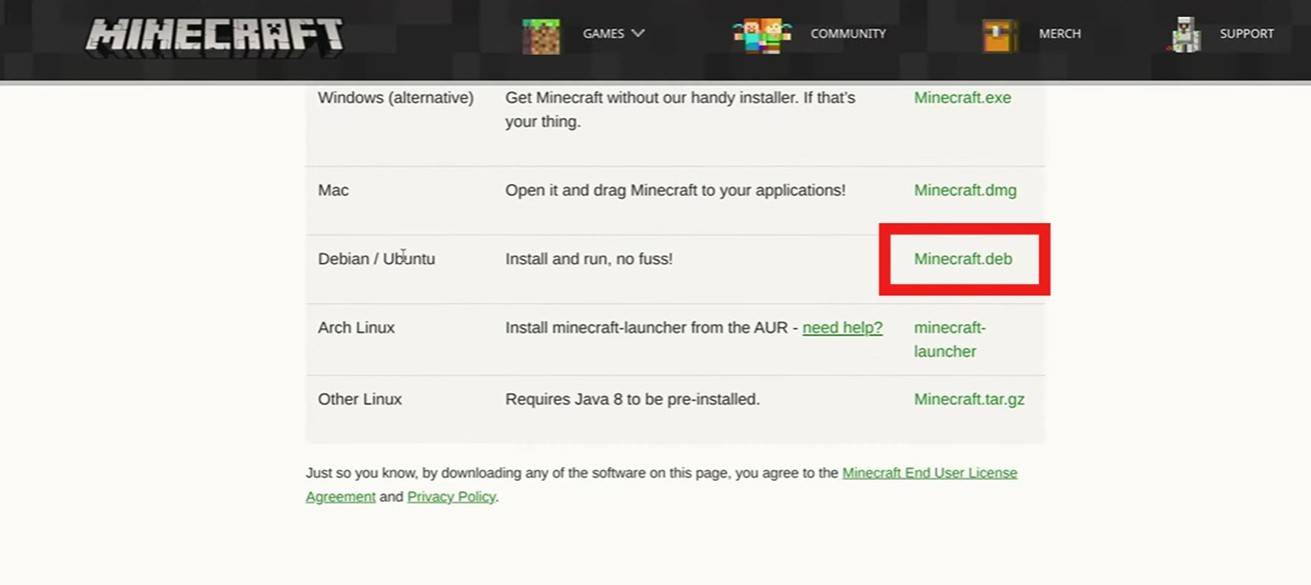 Image: youtube.com